
I came up with this method few days ago having the idea to combine Roux with M2 and Corner First and I’ve also though of having three variations that are obviously: beginner’s, intermediate and advanced;
If you already know Roux, M2 and eventually CF (Corner First), you’ll get the hang of this method quite quickly.
n.b: if you don’t know how to solve a Rubik’s cube, I suggest you check it out on my upcoming LbL tutorial or my videos on YouTube.
Beginner’s variation
the steps are the following ones:
|
|
|
|
|
|
|
|
|
|


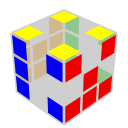
1. First Block
This step is quite intuitive, you can either build the block by solving the LD edge than the pairs (any LbL methods) or build as you would do with Roux or ZZ.
tips for building the block faster and more efficiently:
1. Consider using either cross edge + F2L pairs as well as 1x1x2 blocks + edge + F2L pair
2. when pairing and F2L pair, do not use rotations but <F, B, M, U> move group or <F, M, U> move group (when the 1x2x2 block is built on the back: orange-white-green block;) to pair and insert the pair.
3. when the D sticker of the corner of the block that need to be paired with the corresponding edge (to form the block/pair) is facing the side, place it in a way that it face either toward L or R and having the edge on the M layer for easier pairing (unless the F2L case can be done without any rotations and any long and complex algs).
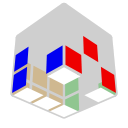
2. Last 2 Corners of the First Layer
This step can be done using 2×2 FL building technics and obviously basic LbL algos.
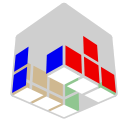
3. RD edge
This step is fairly simple, you just have to solve the RD edge to complete the bar.
Here some case (the rest can be easily brought to one of those or be mirrored .
 |
 |
 |
 |
 |
 |
 |
 |
 |
4. Corner Orientation of Last Layer
|
|
|
|
|
|
|
|


5. Corner Permutation of Last Layer
|
|
|
|
|
|


6. Last Edges of the First Blocks
Here is the cases for the FR edge, to solve the RB edge just mirror the casse on S (S slice) or do y2 and mirror them on M
|
|
|
|
|
|
|
|


7. Side Layers
This step let’s you choose between: solving the 2 remaining edges at the same time, orienting both than permuting them, solving one than the other.
 |
 |
 |
 |
|
|
|


|
|
|
|
|


8. Orientation of the Edges of the Middle Layer
|
|
|
|


n.b: you can finish this step by just using the first case 1-2 times.
9. Permutation of the Edges of the Middle Layer+Last 4 Centres
|
|
|
|
|


Intermediate variation
|
|
|
|
|
|
|
|

1. Left Block
Exactely the same as with the Beginner’s variation.
2. RD bar
3. Corner of Last Layer
COLL and CPLL in one step:
| COLL\CPLL |
|
|
|
|
|
|
|
|
F (R U R’ U’)3 F’ | y’ F R U’ R’ U R U2 R’ U’ R U R’ U’ F’ | R U2 R’ U’ R U R’ U’ R U’ R’ | y R U R’ U R U L’ U R’ U’ L |
y’ R U R’ U R U L’ U R’ U’ L |
y F R U’ R’ U R U2 R’ U’ R U R’ U’ F’ |
|
|
R U D’ R U R’ D R2 U’ R’ U’ R2 U2 R | y F U R U’ R’ U R U2 R’ U’ R U R’ F’ | F (R U R’ U’)2 F’ or R U2 (R2 U’)2 R2 U2 R | R’ F2 R U2 R U2 R’ F2 U’ R U’ R’ | y’ R U R’ U F2 R U2 R’ U2 R’ F2 R | y2 L’ U R U’ L U’ R’ U’ R U’ R’ |
|
|
R’ U R2 D r’ U2 r D’ R2 U’ R | y l’ U’ L U R U’ r’ F | R’ U R U2 L’ R’ U R U’ L | y’ R’ U’ R F R2 D’ R U R’ D R2 U’ F’ | y R U2 R’ F2 R U2 R’ U2 R’ F2 R | y’ r U R’ U’ r’ F R F’ |
|
|
U’ F R U R’ U’ F’ U | L2 D L’ U2 L D’ L’ U2 L’ | y’ R U R’ U’ R U’ R’ U2 R U’ R’ U2 R U R’ | y’ R’ U’ R F R2 D’ R U R’ D R2 U’ F’ | y2 R’ F2 R U2 R U2 R’ F2 R U2 R’ | R2 D’ R U2 R’ D R U2 R |
|
|
y’ L’ U2 R U’ R’ U2 L R U’ R’ | y’ R U2 R D R’ U2 R D’ R2 | y’ R U2 R’ U’ R U R’ U’ R U R’ U’ R U’ R’ | y2 R’ U2 R’ D’ R U2 R’ D R2 | y’ F R’ F’ r U R U’ r’ | F’ L F l’ U’ L’ U l |
|
|
y2 R U R’ U L’ U R U’ L U2 R’ | y2 R2 D’ R U2 R’ D R2 U R’ U R | R U R’ U R U2 R’ | y2 R’ U2 R U2 L U’ R’ U M x | y’ F R’ U2 R F’ R’ F U2 F’ R | R U’ L’ U R’ U’ L |
|
|
y R’ U’ R U’ L U’ R’ U L’ U2 R | y2 F’ L U2 L’ F L F’ U2 F L’ | R U2 R’ U’ R U’ R’ | y L’ U R U’ L U R’ | y R2 D R’ U2 R D’ R2 U’ R U’ R’ | y R U2 R’ U2 L’ U R U’ M’ x’ |
|
|
F R U’ R’ U’ R U R’ F’ R U R’ U’ R’ F R F’ | R U R’ U’ R’ F R2 U’ R’ U’ R U R’ F’ | skip | R’ U L’ U2 R U’ R’ U2 R L U’ | R’ U2 R’ d’ R’ F’ R2 U’ R’ U R’ F R U’ F | L U2 L’ U’ L U2 R’ U L’ U’ R |
4. LEF2B
It’s basically the same thing as for the previous variation but you will need to insert both edges in one motion, what I mean by that is that you should prepare both edges in way that you can insert them just with one M move after getting their place on the M slice (both or one after the other) than after just undoing the placement setup like if you would do a commutator on FR and RB with the M slice free.
5. Side Layers
You just have to do the commutators the same way as above except that you would have to align both places on M.
6. OEML
This time you’ll need to know the three cases
7. PEML+L4Ce
Yeah !! Nothing to learn for this step !!
Advanced variation (in development)
|
|
|
|
|
|

1. Left Block
still the same except that you should think in an FMC way such as you built it in the least move possible.
2. RD bar
n.b: if you solve one corner and the RD edge, make sure that when you insert the last corner to form the bar while orienting the CLL (or at least influence it to get the COLL set you want) by using either WV or SV.
3. CLL
Same as the previous variation.
4. Last 4 Side Edges
There isn’t any algs for this step (yet). But by using 3-cycles and insertions influencing (basically trying to make the insertion of one/two of those edges easier)
5. Edge of Middle Layer+L4Ce
EOML and EPML in one step including the L4Ce.
|
|
|
|
|
|
|
|
|
|
|
|
|
|
|
|
|
Orient2bkCCWcycle
D2 F’ R’ L D’ R2 L2 F2 U’ R’ L F |
|
Orient2bkCe
U R’ L F R2 U2 L2 B R’ L U R2 B2 L2 |
| Orient2dgbkCWcycle
F R L’ U’ F2 R2 L2 D’ R L’ F D2 |
Orient2dgbkCCWcycle
U R’ L F’ U2 R2 L2 B’ R’ L U B2 |
Orient2dgbkH
U R’ D F B’ L’ F L’ F’ B D F’ R U’ |
Orient2dgbkCe
U R’ L F’ R2 U2 L2 B’ R’ L U’ R2 B2 L2 D2 |
| Orient2ftCWcycle
U F’ B L F2 L’ F B’ U F2 U2 |
Orient2ftCCWcycle
U2 F U D’ L’ U2 L U’ D F’ |
Orient2ftH
U R D’ F B’ L B’ L F’ B D’ B R’ U’ |
Orient2ftCe
U R L’ F U2 R2 D2 B R L’ U L2 F2 R2 |
| Orient2dnCWcycle
B2 U R L’ B’ R2 L2 U2 F’ R L’ U |
Orient2dnCCWcycle
U2 B2 U R L’ B’ R2 L2 U2 F’ R L’ U’ |
Orient2dnH
U F D F2 R’ B2 U2 F2 L’ B2 D F’ U’ |
Orient2dnCe
U2 R2 F R L’ U L2 F2 R2 D R L’ F L2 |


